
Understanding Rows
In Raycaster, rows represent individual entities in your sheet - a company, a person, or any other item you’re researching. Each row contains cells that hold data for the different columns in your sheet.Adding Rows:
Click “Add Row” to add a new row. You can also import a preexisting CSV.
Managing Rows
Selecting Rows
To work with existing rows:- Click on the row number or checkbox to select a single row
- Hold Shift and click to select a range of rows
-
Click the header checkbox to select all visible rows

Deleting Rows
To remove rows from your sheet:Duplicating Rows
To create a copy of existing rows:- Select the row(s) you want to duplicate
- Right-click and select “Create new Sheet” from the context menu
- The system will create copies into a new sheet
Working with Cells
Editing Cell Values
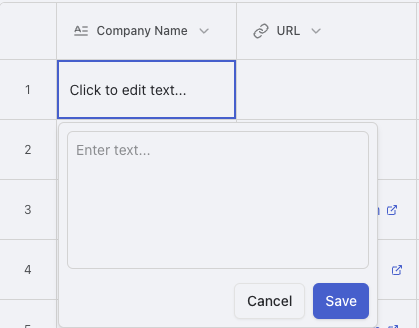
To modify data in a cell:- Click on the cell you want to edit
- Enter or modify the content
- Press Enter or click outside the cell to save changes
- Press Escape to cancel editing
Cell Types and Editors
Different column types have specialized editors:- Text: Simple text entry or rich text editor
- Number: Numeric input with formatting options
- Boolean: Toggle switch or checkbox
- Select: Dropdown menu of predefined options
- Multi-select: Checkbox list of options
- Date: Date picker calendar
- URL: Link input with validation