Understanding Columns
Columns in Raycaster organize different types of information about your companies and people. Each column has a specific data type that determines how information is stored, displayed, and edited.Column Types
Raycaster offers several column types to handle different kinds of data:| Column Type | Description | Use Cases |
|---|---|---|
| SINGLE_LINE_TEXT | Short text content limited to one line | Names, titles, short identifiers |
| MULTI_LINE_TEXT | Plain text content spanning multiple lines | Notes, brief descriptions |
| TEXT | Rich text content with formatting | Detailed descriptions, formatted content |
| NUMBER | Numeric values with formatting | Revenue, headcount, funding amounts |
| BOOLEAN | True/false values | Yes/no flags, verification status |
| SINGLE_SELECT | One choice from predefined options | Status, category, stage |
| MULTI_SELECT | Multiple choices from options | Tags, features, capabilities |
| URL | Web links | Websites, social profiles, documents |
| Email addresses | Contact information | |
| DATE | Date values | Founded date, last contact, deadlines |
| ACTION | Interactive research triggers | Research actions, data enrichment |
| RESEARCH | AI-powered research content | Detailed analysis, insights |
| JSON | Structured data in JSON format | Complex data, API responses |
| FILE | File attachments | Documents, presentations, spreadsheets |
| IMAGE | Image references | Logos, diagrams, visual content |
| AVATAR | Profile pictures | Person identifiers, profile images |
Adding a New Column
Set Column Properties
Configure the basic properties:
- Name: Enter a descriptive column title
-
Type: Select the appropriate data type
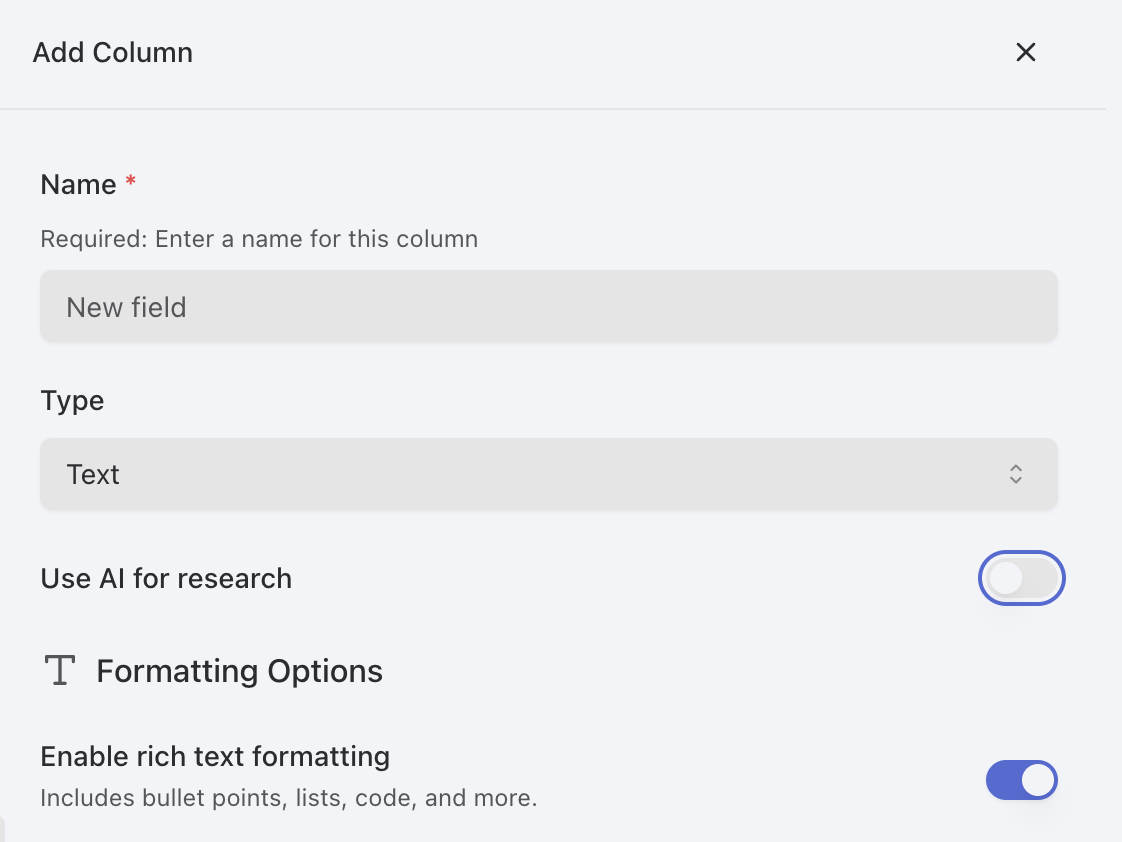
Configure Type-Specific Options
Depending on the selected type, additional configuration options will appear:
- For TEXT: Enable/disable rich text formatting
- For NUMBER: Set prefix, suffix, abbreviation options
- For SINGLE_SELECT/MULTI_SELECT: Define the available choices
- For DATE: Configure date format
Enable AI Capabilities (Optional)
Toggle “AI Capabilities” if you want to enable research for this column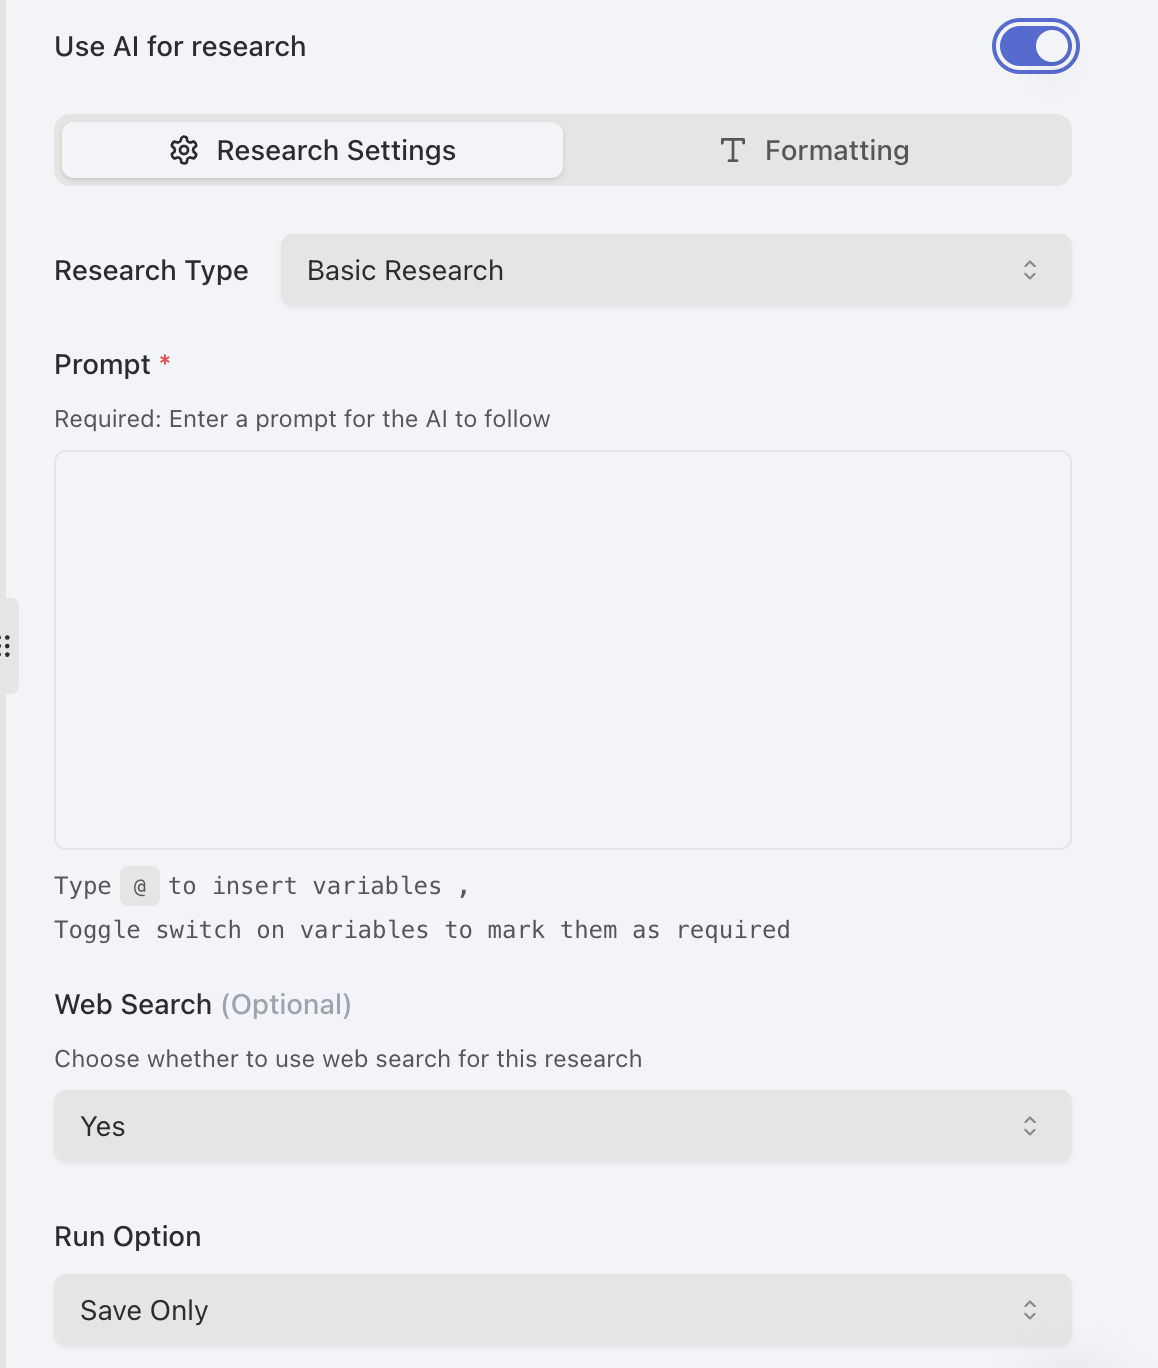
- Set the research tool type
- Configure the prompt template
- Configure formatting
- Enable/disable web search
- Choose Run option
- Save all will just save the column
- “Run” will run research on the column
Enabling AI capabilities allows Raycaster to automatically research and populate this column with information.
Configuring Column Types
Each column type has specific configuration options:TEXT Column
- Rich Text: Enable for formatting options like bold, italic, lists, and headings
- Single Line: Limit to a single line of text without paragraph breaks
- Character Limit: Optionally set a maximum character count
NUMBER Column
- Prefix: Add text or symbol before the number (e.g., ”$”)
- Suffix: Add text after the number (e.g., ”%”, “M”)
- Decimal Places: Set number of decimal places to display
- Abbreviate Large Numbers: Enable to show 1,000,000 as 1M
BOOLEAN Column
- Labels: Customize display text for true/false values
- Default: Set the default state for new entries
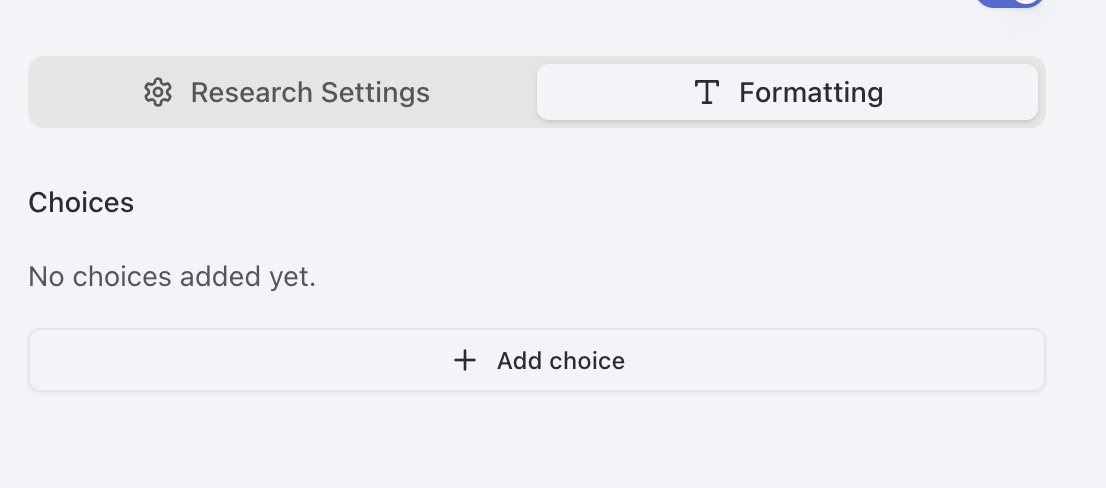
SINGLE_SELECT Column
- Options: Define choices with:
- Name
- Color
- Description (optional)
- Default: Optionally select a default value
- Utilize Formatting to add selections
MULTI_SELECT Column
- Options: Define choices with name and color
- Limit: Optionally set maximum number of selectable options
- Utilize Formatting to add selections
DATE Column
- Format: Choose date display format (e.g., MM/DD/YYYY)
- Include Time: Toggle to include time component
- Default to Current Date: Toggle to use current date for new entries
Enabling AI Research for a Column
To configure a column for AI-powered research:Select Research Tool
Choose from available research tools:
- ADVANCED: advanced features like web search and location-aware research.
- STRUCTURED: AI powered research
- EMAIL FINDER: Find emails for a company/person
- COMPANY ENRICHMENT: Company specific data
- PEOPLE ENRICHMENT: People specfiic data
- And others depending on your sheet type
Configure Prompt
Write a research prompt that specifies what information to gather
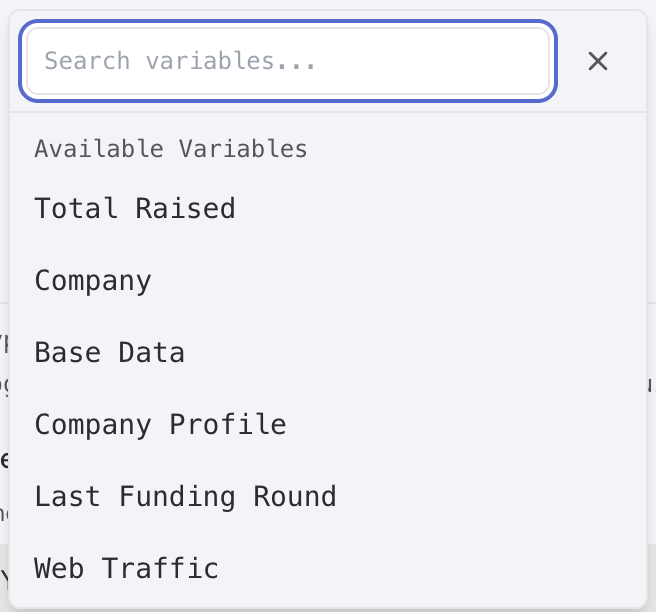
- Use variables from other columns utilizing the ’@’ character
-
Be specific about the information you want
Managing Existing Columns
Editing Columns
To modify an existing column: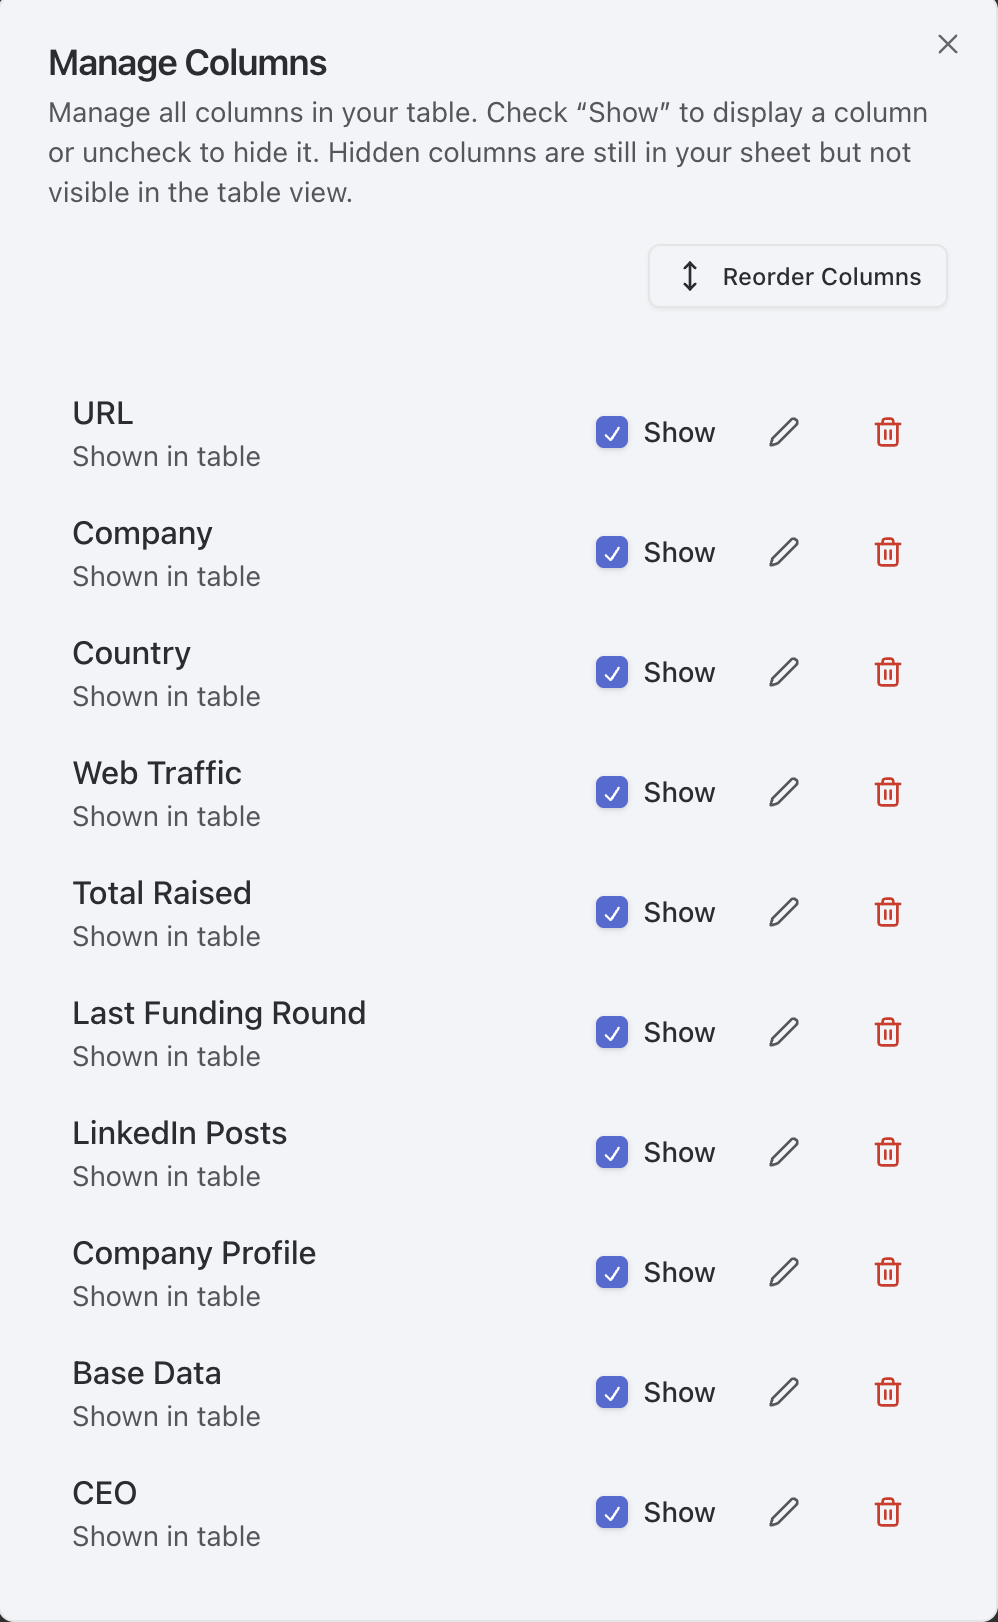
Reordering Columns
To change the order of columns in your sheet: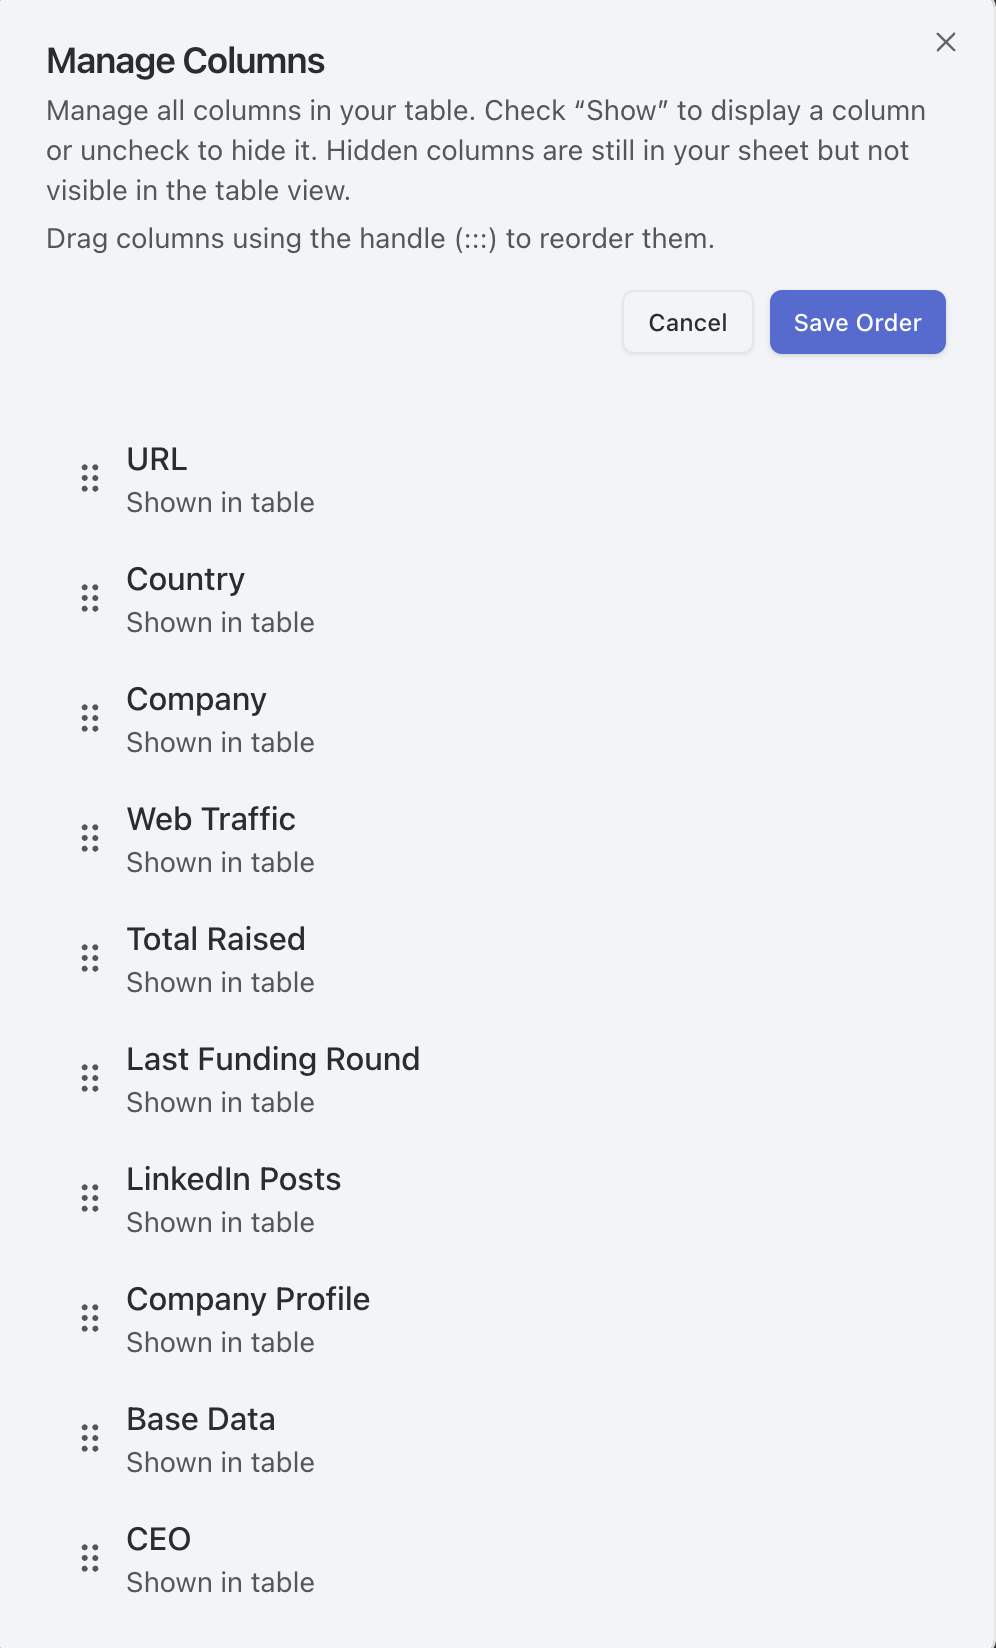
Hiding Columns
To hide columns without deleting them:- Click “Manage Columns” in the toolbar
- Find the column you want to hide
- Toggle the visibility switch to off
- Click “Save” to apply the changes
Hidden columns still store data but are not visible in the table view. You can make them visible again at any time.
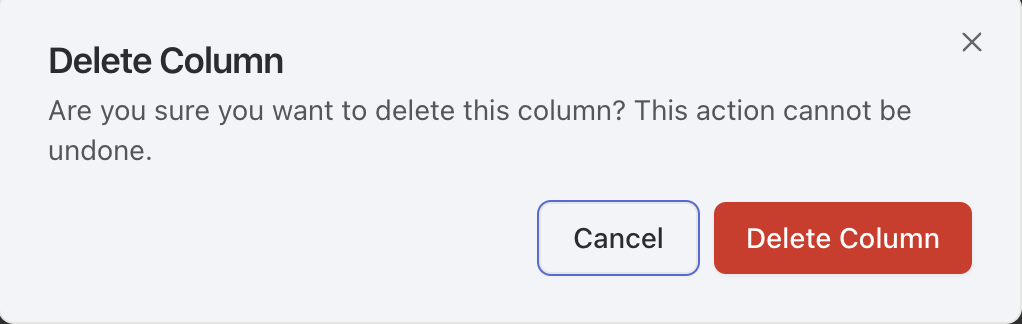
Deleting Columns
To permanently remove a column: